Hey there! 👋 As you may all know that I have been attending the Community Classrooms Hashnode Blogging Challenge as for this week's Weekly Topic is KubeSphere. In this blog, we will explore KubeSphere in detail and how it helps in cloud-native Application Management.
What is KubeSphere?🤔
KubeSphere provides developer-friendly wizard web UI, helping enterprises to build out a more robust and feature-rich platform, which includes the most common functionalities needed for enterprise Kubernetes strategy. KubeSphere also provides high-performance and scalable container service management for enterprises.
The KubeSphere team developed KubeKey, a brand-new open-source installer, to help enterprises quickly set up a Kubernetes cluster on public clouds or data centers. Users have the option to install Kubernetes only or install both KubeSphere and Kubernetes. KubeKey provides users with different installation options such as all-in-one installation and multi-node installation. It is also an efficient tool to install cloud-native add-ons and upgrade and scale your Kubernetes cluster.
KubeSphere Features!💡💡
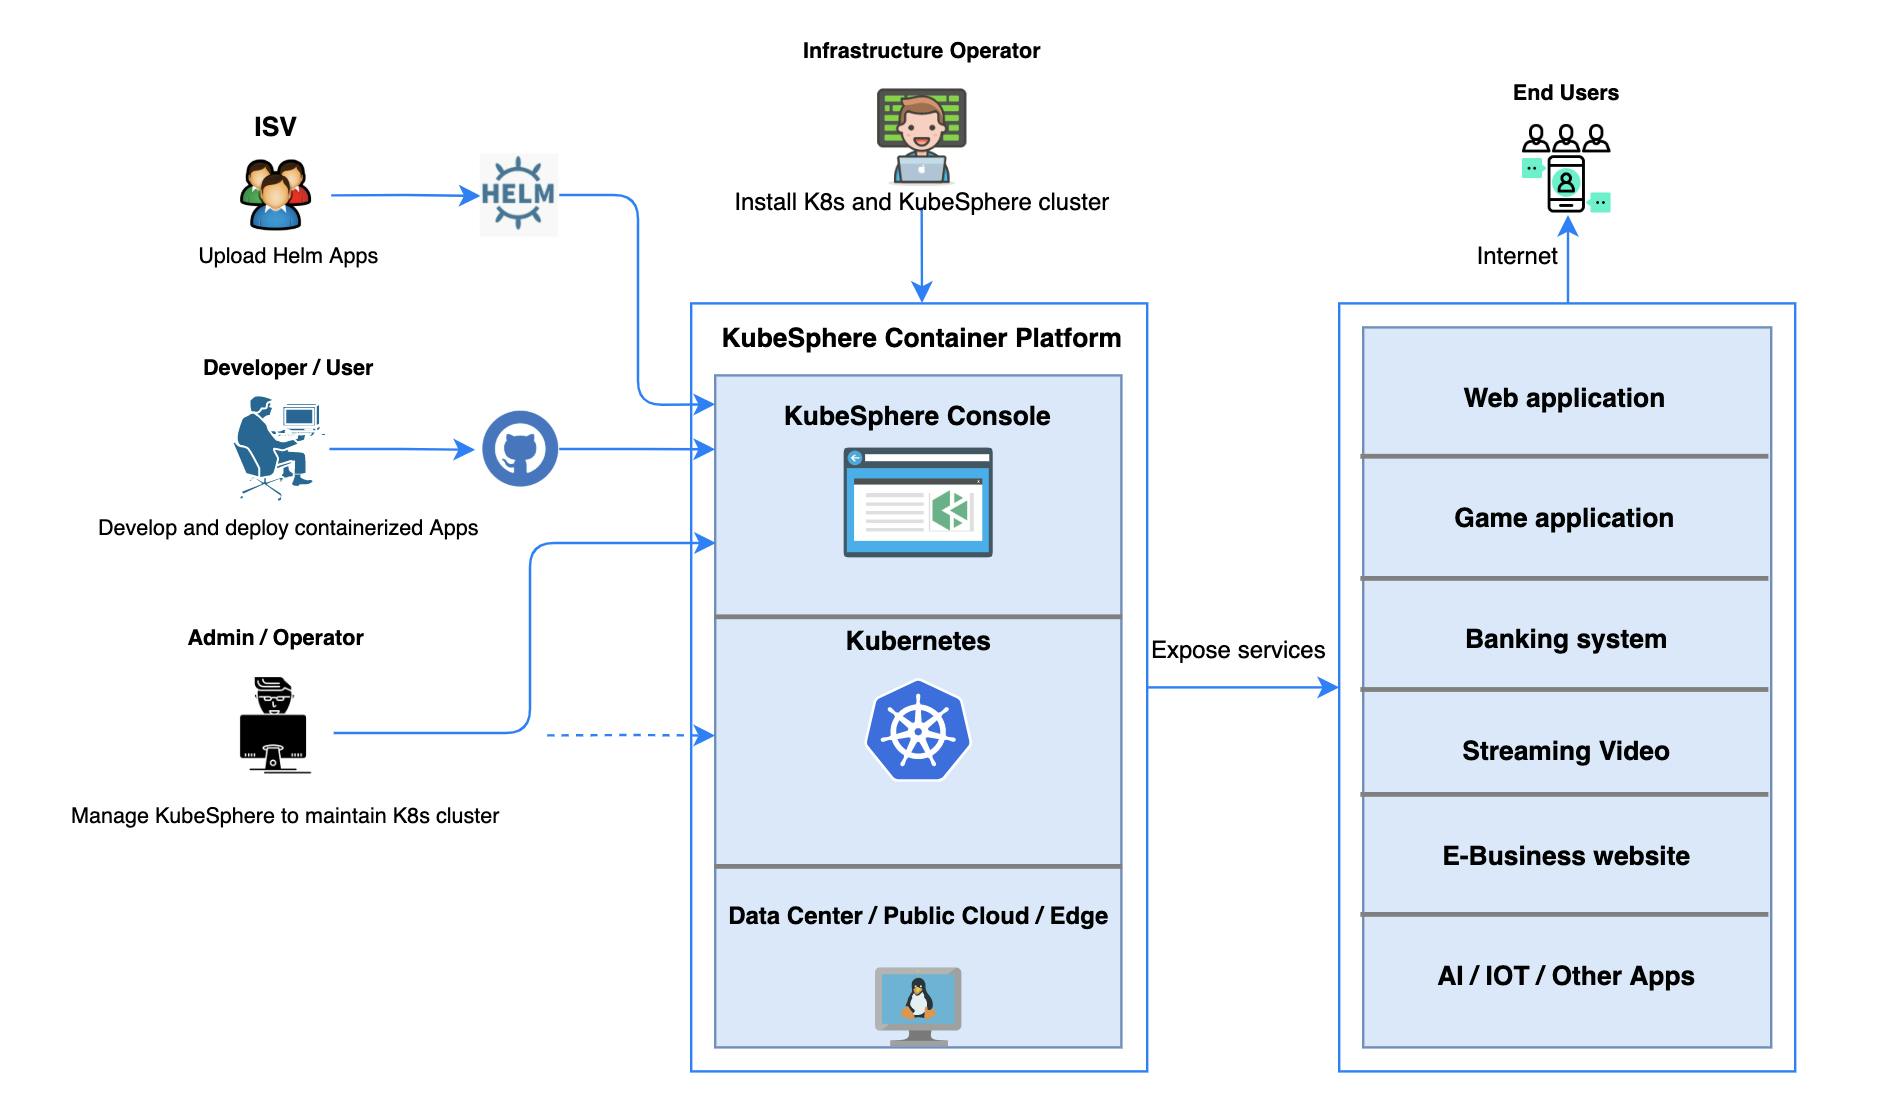
The following Picture elaborates on the key features and benefits provided by KubeSphere. For detailed information, Check out the Official Documentation of KuberSphere Here.

Source: Kubesphere.io
KubeSphere main key features are as follows:-
Provisioning and Maintaining Kubernetes
Multi-cluster Management and Deployment
- DevOps Support
Traffic Management
Visualization
Observability
Application Management and Orchestration
Multiple Network Solutions
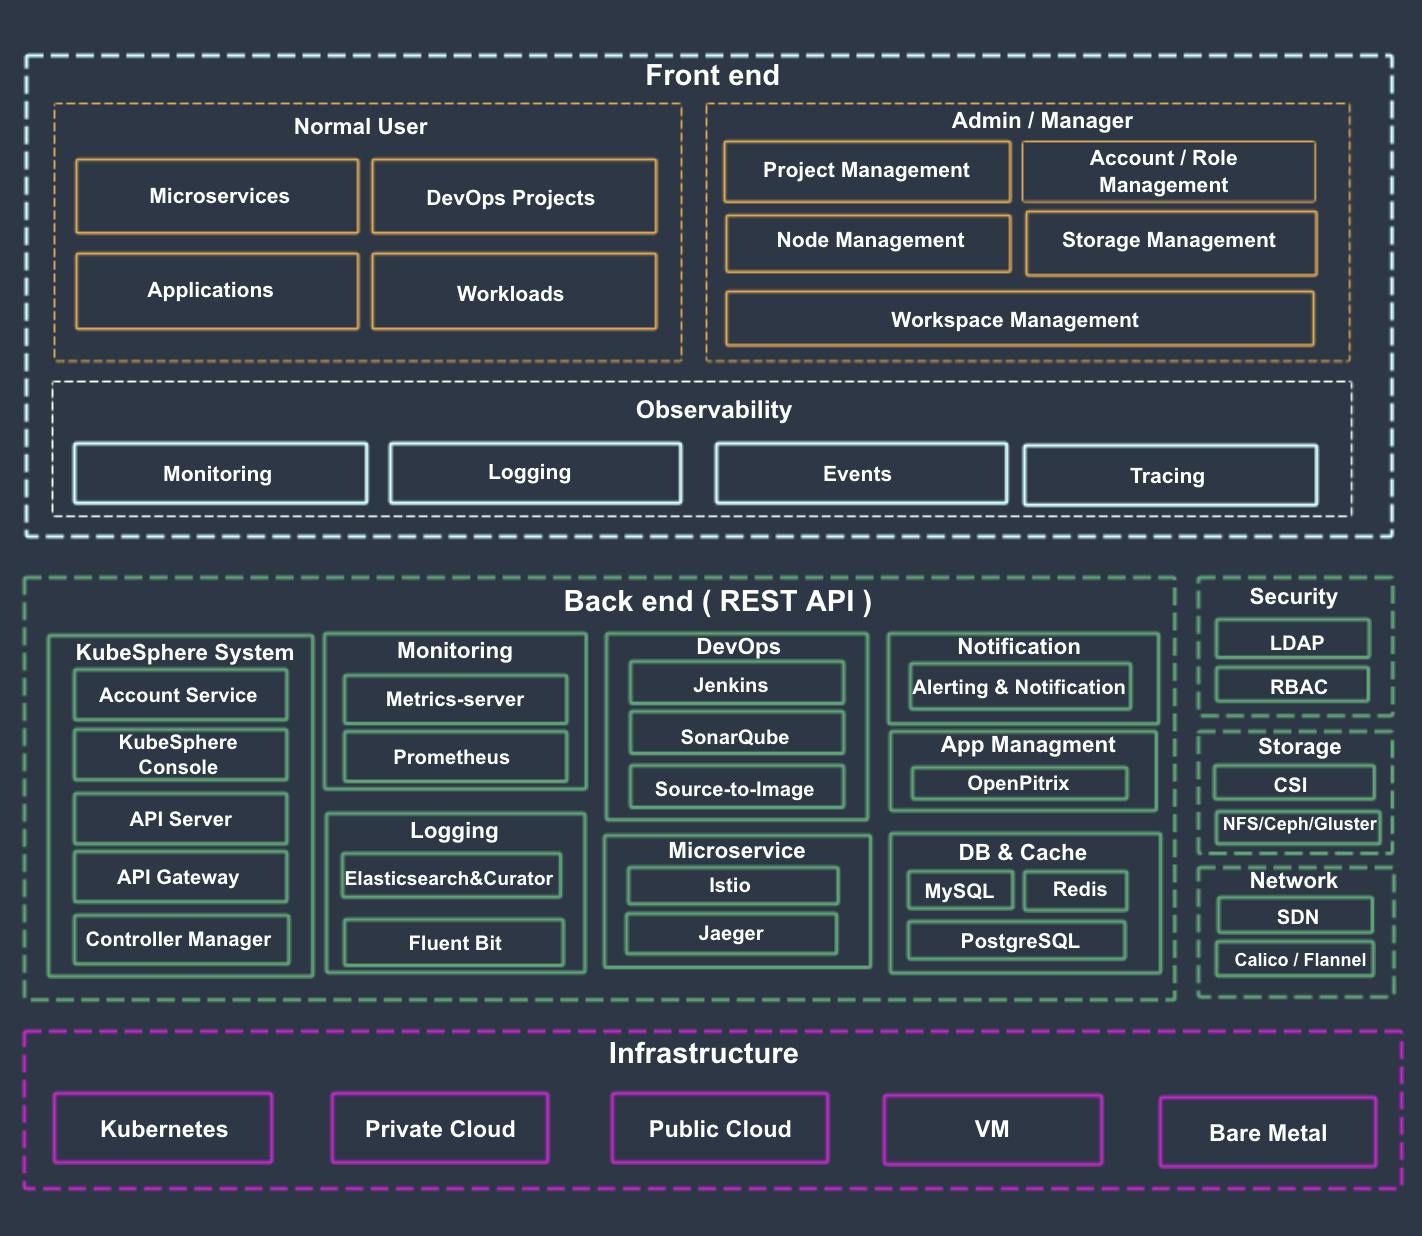
KubeSphere's Architecture 🏗️

Source: kubesphere.io
As you can see in the above PIctures It's Shown that KuberSphere separates the frontend from the backend, and it is a cloud-native application and provides open standard REST APIs for external systems to use. KubeSphere can run anywhere from an on-premise data center to any cloud to edge. In addition, it can be deployed on any Kubernetes distribution.
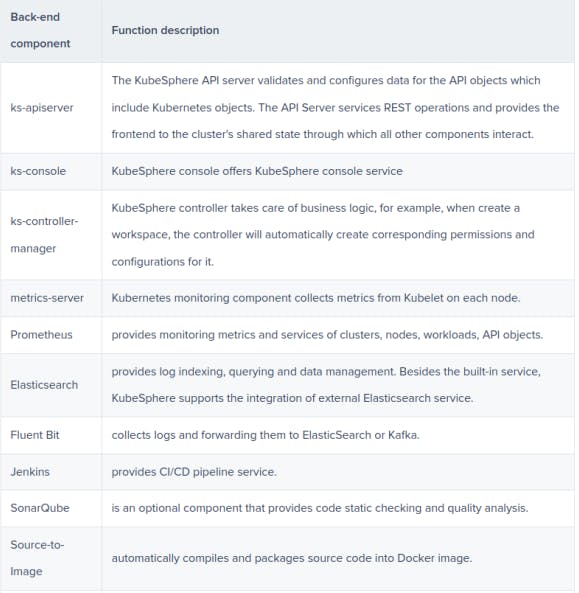
Here is a Components Table by - Kubesphere

KubeSphere Installation on Linux 🐧
- Step 1: Prepare a Linux Machine To get started with an all-in-one installation, you only need to prepare one host according to the following requirements for hardware and operating system.
Node requirements
The node can be accessed through SSH.
sudo/curl/OpenSSL should be used.
- Step 2: Download KubeKey Download KubeKey from its GitHub Release Page or run the following command:
curl -sfL https://get-kk.kubesphere.io | VERSION=v2.0.0 sh -
Note The commands above download the latest release (v2.0.0) of KubeKey. You can change the version ?>number in the command to download a specific version.
Make kk executable:
chmod +x kk
- Step 3: Get Started with Installation You only need to run one command for all-in-one installation. The template is as follows:
./kk create cluster [--with-kubernetes version] [--with-kubesphere version]
To create a Kubernetes cluster with KubeSphere installed, refer to the following command as an example:
./kk create cluster --with-kubernetes v1.21.5 --with-kubesphere v3.2.1
After you run the command, you will see a table for environment check. For details, see Node requirements and Dependency requirements. Type yes to continue.
- Step 4: Verify the Installation If the following information is displayed, Kubernetes and KubeSphere are successfully installed.
 Run the following command to check the result.
kubectl logs -n kubesphere-system $(kubectl get pod -n kubesphere-system -l app=ks-install -o jsonpath='{.items[0].metadata.name}') -f
The output displays the IP address and port number of the web console, which is exposed through NodePort 30880 by default. Now, you can access the console at :30880 with the default account and password (admin/P@88w0rd).
#####################################################
###              Welcome to KubeSphere!           ###
#####################################################

Console: http://192.168.0.2:30880
Account: admin
Password: P@88w0rd

NOTES:
  1. After you log into the console, please check the
     monitoring status of service components in
     "Cluster Management". If any service is not
     ready, please wait patiently until all components
     are up and running.
  2. Please change the default password after login in.

#####################################################
https://kubesphere.io             20xx-xx-xx xx:xx:xx
#####################################################
Note
You may need to configure port forwarding rules and open the port in your security group so that
external users can access the console.
After logging in to the console, you can check the status of different components in System Components. You may need to wait for some components to be up and running if you want to use related services. You can also use kubectl get pod --all-namespaces to inspect the running status of KubeSphere workloads.
Uses Case of KubeSphere 🔥
KubeSphere is applicable in a variety of scenarios like
Multi-Cluster Deployment
High Availability
Low latency
- Isolation
- Avoid's Vendor Lock-in -Full-stack Observability with Streamlined O&M
- Multi-dimensional Cluster Monitoring
- Log Query
- Customization
for more use cases you can check out their official website here
Resources 🤓
Conclusion 😄
Hope you have liked this Blog I have tried to explain everything related to KubeSphere in it in a lot easier way and can't wait to hear your experience with KubeSphere. last but not least thanks to Community Classroom for this weekly Blog challenge!
